Become an influencer with as little money as possible
If you’re thinking about starting your own YouTube channel, then you must have wondered about the cost, complexity and hardware involved. As it happens, we’ve recently taken on the challenge of setting up a YouTube studio for creating YouTube content, so why not come on a journey with us and maybe learn from our mistakes?
We wanted to build a YouTube studio “on a budget”, but didn’t have a specific budget in mind at the outset. We aimed to put together a setup that would result in the content quality we wanted without spending any more money than necessary.
Table of Contents
So let’s take a walk through the process we followed.

Think About Your Content Type
The first thing you need to consider is what sort of content you want to make. This particular YouTube studio setup is designed for “talking” head type tech-explainer videos.
The subject will be framed from the waist up or tighter.This will be the “A-Roll” footage, the main footage of the clip, which is the presenter speaking into the camera. “B-Roll” footage that support what’s being said will be filmed separately or pulled in from other sources.

We can also use this same space to make some of the B-Roll, using a folding table as a place to demonstrate things. However, screen recordings or press footage will also be used, as well as scenes filmed outside.
Unless you are planning on doing exactly the same sort of content, you need to think carefully about how your own content style will affect decisions about what gear to get and how to set it up.
Lighting!
The most important factor in getting footage that looks professional is YouTube studio lighting. Really, even if your camera isn’t all that great, light your subject well and it will look awesome. Even the best camera can’t fix bad lighting.
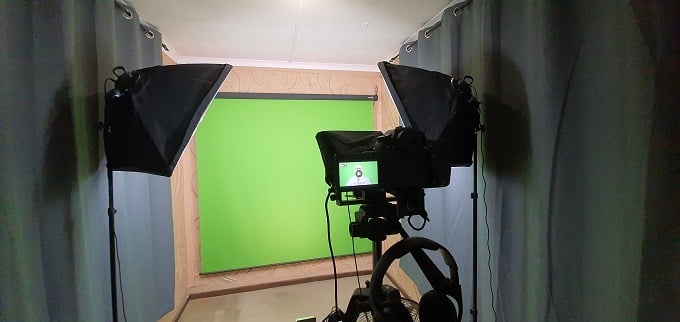
Three-point lighting is the standard for lighting a subject properly. You need a key light, a back light and a fill light. We actually ended up with a four-light setup. With two diffuses softbox LED lights, an LED spotlight on the ceiling and then a battery-powered LED light with barn-doors.
The spotlight lights the subject from the top, the two main lights fill the space with diffuse lights and then the final LED light is used to eliminate some unwanted shadows that result from the two main lights shining on the subject.
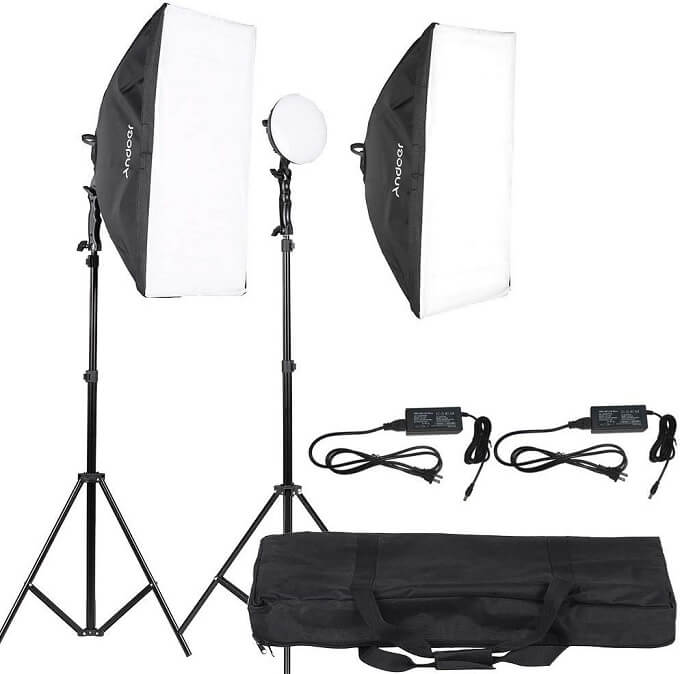
We had to adapt the lighting to our available space, which is rather cramped. Buying a normal three-point lighting kit is fine to start with, but you may notice that in your particular studio space more may be needed.
Since we are using a chroma-key screen, it would have been optimal to have two additional bank lights between the subject and the screen itself. Space constraints made this impossible, but the only real effect of this is that tuning the chroma keying takes a little more work. The end result was still acceptable.
The specific lighting kit we used was this Andoer Photography set and the third light is this Yongnuo YN300 III, which also works as an excellent camera-mounted light when shooting outside of the studio space.
The Green Screen
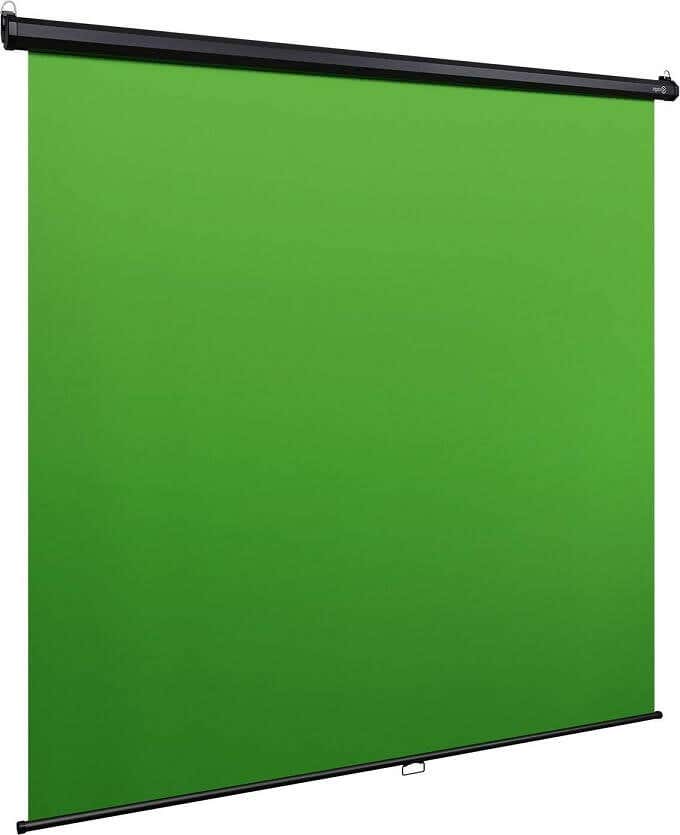
Speaking of the chroma key “green screen”, since we are never going to film anyone framed full-length, it would have been pointless to get a green screen with a so-called “infinity drop”.
That is a screen that goes from the top of the frame onto the floor, so that your subjects can stand on it. Not only is this a pain to light, the maintenance is pretty awful too.
Instead we found this awesome Elgato green screen that works like a projector screen. We put some hooks on the wall, attached the screen and now it just rolls down when needed. Our subject is completely surrounded by green when framed, so it worked out pretty well.
Audio Is Tricky
Believe it or not, the hardest part of making videos in a YouTube studio is getting the audio right. Viewers will tolerate imperfect visuals, but few things will make someone move on to another video than poor audio.
There are two elements to this problem. One is the acoustics of the room and the other is your microphone.
We don’t necessarily want to “soundproof” the room. That’s a massive, expensive undertaking that we can work around by using microphones that won’t pick up too much external noise and simply editing out issues or filming when things are quieter.
What’s far more important is the acoustic treatment of the room. Specifically when it comes to reflectance. That’s when sound emanating from a source bounces around the room. The best way to cut down on this is to have dense, soft materials in the room. Couches, curtains and the like.
It’s why so many podcasters record their work inside a closet. The clothes suck up all the reverb, making for that lovely dry recording sound. You don’t want to completely kill reflectance, because going to far the other way can make recordings sound lifeless. In our case the room had the green screen at one end, a wooden closed at the other and a carpet.
Reflectance was an issue between the two bare walls to the side. The solution we used was to hang two thick curtains on either side, out of shot. This cuts down on reflected sound.
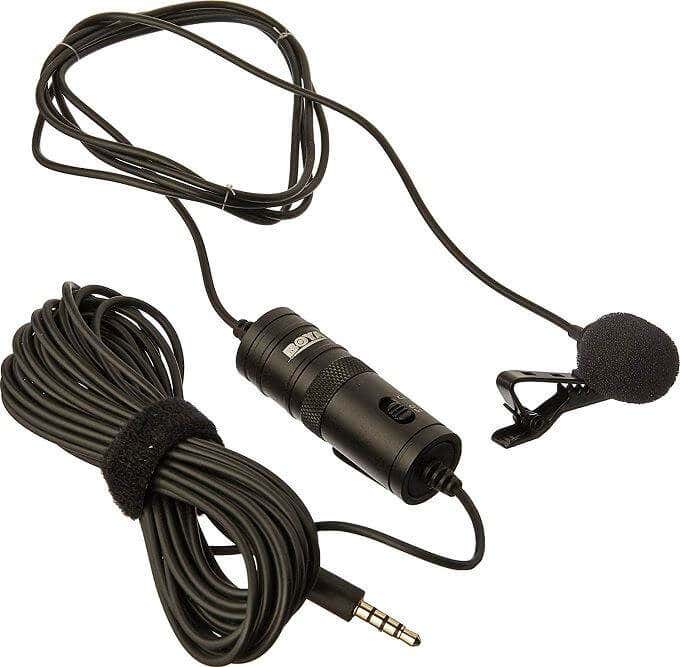
We then used a wired lavalier microphone, which doesn’t pick up distant sound too strongly. You can of course use a microphone on a stand off-camera (or on camera, your choice), but keep in mind that each type of microphone has its own pros and cons. Boom microphones are also an option, but they do tend to pick up more room noise.
Camera & Teleprompter Setup
In our YouTube studio, we used a smartphone-based teleprompter, combined with the Elegant Teleprompter app and an old smartphone we had laying around. Scripts are written in Google Docs and then imported directly into the teleprompter app.
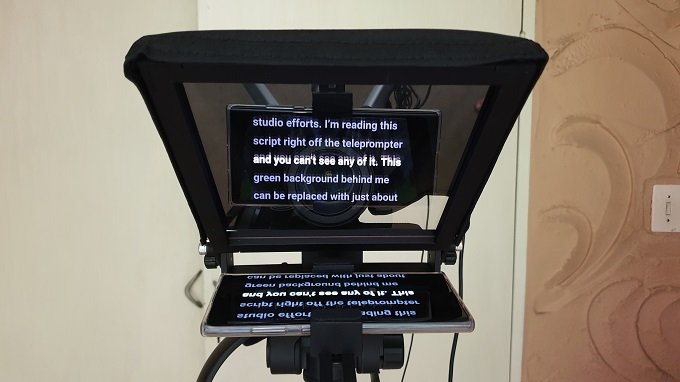
The phone is then mounted onto the teleprompter, with the Canon 80D camera we used looking through the mirror. The 80D is an excellent all-round prosumer camera and is especially good as a video camera, since it has autofocus and face detection.
The teleprompter will work with a variety of cameras, it even comes with a smartphone mount on the camera side. Which means with two smartphones you already have a complete setup. Run the lavalier microphone to the smartphone that’s recording and you’re set.
The Final Product
Now, with everything in place, here you can see the final product.
From here the background needs to be keyed out. Most popular video editing applications have this function built in. This includes Adobe Premiere Pro, Final Cut Pro and many others.
For this project we used an iPad Pro 12.9” tablet running Luma Fusion, a desktop-grade video editing application for iOS.
This is what the final YouTube studio setup looks like.
It’s a budget home setup, but with just this relatively small investment and a bit of time and effort, you can make videos that reflect greater attention to detail and produce a much more pleasant experience for your audience.
Of course these are just the raw tools you need. Most of the work happens with other parts of the workflow, such as scripting, editing and the actual performance for the camera itself.
Even the most professional YouTube studio can’t make you a better content creator and the best content creators can make something compelling with the barest of essentials.