Get a virtual static IP address so you can connect from anywhere
What is Dynamic DNS you might be asking? Basically, dynamic DNS is a service provided by third-party providers whereby a constantly changing IP address given by an ISP is updated regularly and associated with a hostname given by the company. If you have a broadband Internet connection at home, you more than likely have a dynamic IP address.
A dynamic IP address changes every so often, as compared to a static IP address, which never changes. Normally, a changing IP address does not cause any problem until you try to connect to a local device from outside of your home network. With a constantly changing IP address, you may be able to connect a few times, but not after the IP address updates.
Table of Contents
So why would you want to find your computer on the Internet in the first place? Well there are several reasons why you may want to know your dynamic IP address:
1. Connect to your computer via Remote Desktop Connection and access your files
2. Stream audio and video from your home media server to any location in the world
3. View and control an IP cam from anywhere
There are many more reasons why it could be useful to know your IP address. So why doesn’t everyone have a static IP address? Well, it’s basically a lot cheaper for ISPs to keep rotating IP addresses to their clients. If you want a static IP address, you will have to pay an extra monthly charge and most ISPs won’t even offer them to residential customers.
Dynamic DNS
That’s where dynamic DNS comes into play. Using this service, you can theoretically create a static IP address for your home computer. Here’s how it works. When you visit any web site on the Internet, you can either type in the IP address or you can enter in the domain name, like www.online-tech-tips.com. There are DNS servers all over the world that keep track of which names correspond to which numeric IP addresses.
When you visit a website, your computer first looks up the IP address from a DNS server and then requests the site. This is great for servers that have static IP addresses that never change, but it’s not well suited for servers that are on home broadband connections. This means that your server is constantly “moving” on the Internet and it messes up the one-to-one relationship between domain names and IP addresses.
The solution to setup dynamic DNS, whereby a third party server keeps track of what its current IP address is and gives out this information when you type in your unique domain name. In this way, you can give your dynamic IP address a virtual static IP address. When connecting to your computer, you would either type in the domain name or you would ping the domain name to find the current IP address.
The domain names are always subdomains of the company you are setting up an account with. For example, one provider of dynamic DNS services is no-ip.com. So when you register and create a hostname, it would end up looking something like aseemkishore.no-ip.com. The first part is whatever you want as long as someone else already hasn’t taken it.
In order to determine your current IP address, all of these services work in one of two ways: either you install a piece of software on your computer that constantly updates their servers or you configure the service on your router, if it is supported. A lot of newer routers have dynamic DNS providers like DynDNS built-in, so you can have the router automatically update the IP address to the dynamic DNS provider when it changes.
How to Setup Dynamic DNS
One of the best dynamic DNS providers was DynDNS, but they recently removed all their free plans in 2014. It’s only $25 a year for their remote access plan, which is pretty cheap for the features you get, but it’s still not free!

If you really plan to connect remotely a lot from different parts of the world and you want something very reliable, DynDNS is definitely worth paying for.
However, there are several free options that do a pretty good job and will work just fine for most people. I’m going to write about my current favorite, which is no-ip.com. I’ll also mention a couple of more at the bottom of the post.
no-ip

The free dynamic DNS provided by no-ip includes up to 3 hostnames, email support, dynamic DNS updates (obviously) and URL & Port 80 redirects. Having multiple hostnames is a nice feature in case you have multiple devices you want to remotely access and you want a different hostname for each device. The devices can also have different locations, so you could use one hostname to connect to a computer at home and another to connect to a computer at work.
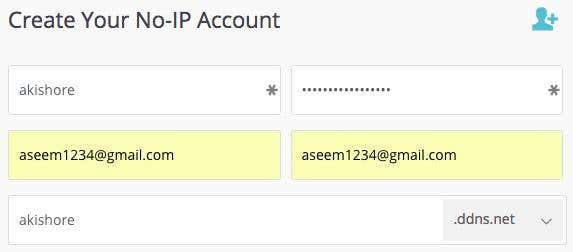
To get started, click on the Sign Up Now button and create your account. You’ll be asked for one hostname and you can type it in or choose to create it later.
You’ll get a confirmation email and once you log into the site, you’ll be brought to the member area and a pop up will appear with the steps you have to take next.
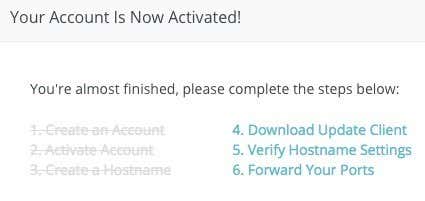
The next thing to do is to download the update client, as that is the tool that will constantly update the no-ip servers with your current dynamic IP address.
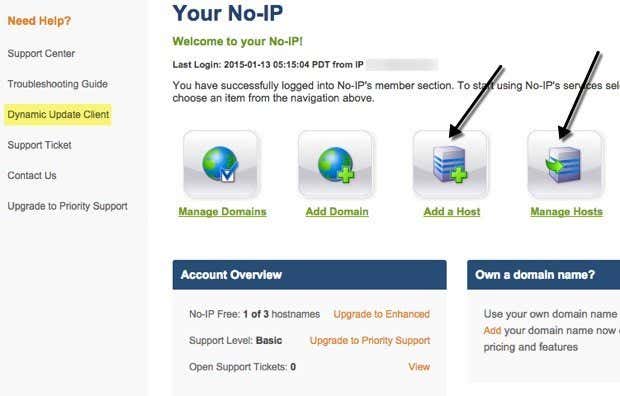
If the popup doesn’t appear when you login, you can just click on Dynamic Update Client in the left hand menu. It will automatically determine your OS and show the correct download for Mac, Windows, etc.
After running it, you’ll need to first login with your no-ip credentials as shown below.
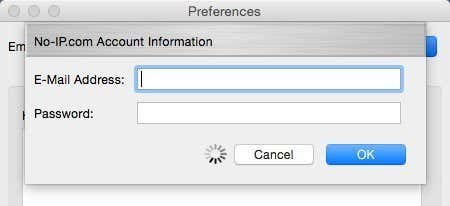
Once you do that, you’ll get some message about select a host. It will list out the host names you have created, so just check the box next to the one you want.
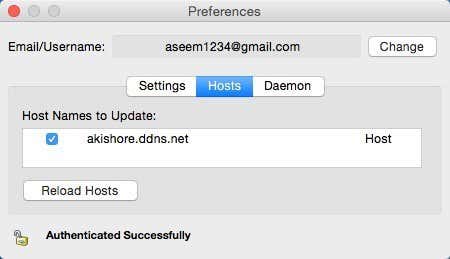
The only other thing I would suggest is clicking on the Daemon tab and clicking the Start button and also checking the Launch Daemon at System Startup box. If you do this, you won’t have to run the client update program at all since there will be this background application that will do the updating automatically.
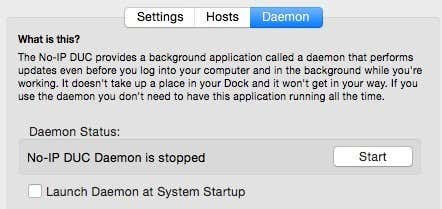
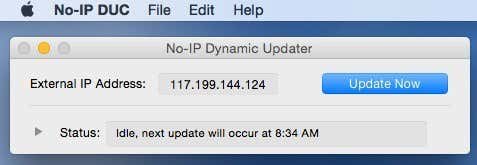
If you don’t start the Daemon, you’ll need to keep the updated program running all the time. It’ll just sit on your desktop and tell you the current status.
You can also click on the Settings tab and check the box to start the updater program when logging in. However, I have found it much more convenient to just use the daemon and not worry about the updated app at all.
You should now be able to simply ping the hostname (akishore.ddns.net in my case) and get the correct dynamic IP address. You can also add more hostnames by clicking the Add a Host button from the member area.
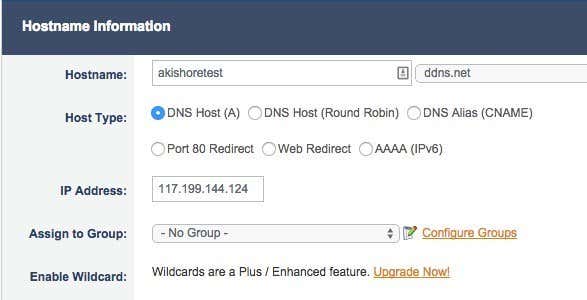
By default, the first hostname you created used the DNS Host (A) for the Host Type. This will be pretty much what 99% of users will use. If you hover over the little question marks next to the settings, you’ll get more detailed information on each of the options.
If you are running a web server and your ISP has blocked incoming traffic on port 80, which a lot of ISPs do, then you can select Port 80 Redirect. You basically run your web server on a different port and then specify that port number in the no-ip settings. The user will not have to type in the port number in the URL in order to connect to the web server.
Web Direct will simply redirect the user to any URL that you want. This option cannot be used for remote connections obviously since it’s just redirecting to another URL.
Skip everything else on the page and click on Add Host. You can now download the client software on another machine and choose the new host name for that particular instance of the updater program.
Note that you have only completed one step in setting up remote access to a device on your local network. You now have to forward the appropriate ports on your router to the appropriate devices on your network. Luckily, I’ve already written extensively on port forwarding and how you can configure it on your router.
That’s about it. Once you have dynamic DNS running and port forwarding setup, you can use your new hostname with a port number (akishore.ddns.net:3389) to connect to a computer or webcam or anything else.
As I said earlier, no-ip isn’t the only option for dynamic DNS. Here are a couple more that have good reviews.
https://duckdns.org/install.jsp
http://www.changeip.com/services/free-dynamic-dns/
The process after setting up dynamic DNS can be a bit complicated, so if you have any questions, feel free to post a comment. Enjoy!